
Fill in a form. Download a server.
The generator turns your choices into a complete Node.js backend: the full source code, ready to run on your own computer or server, with a client for your Unity game or website.
- In your browserNothing to install to generate.
- Yours to keepSource code, no lock-in, host it anywhere.
- Pay onceUnlimited projects, free 1.x updates.
Everything on one screen
Settings on the left, your download on the right, checked as you type.
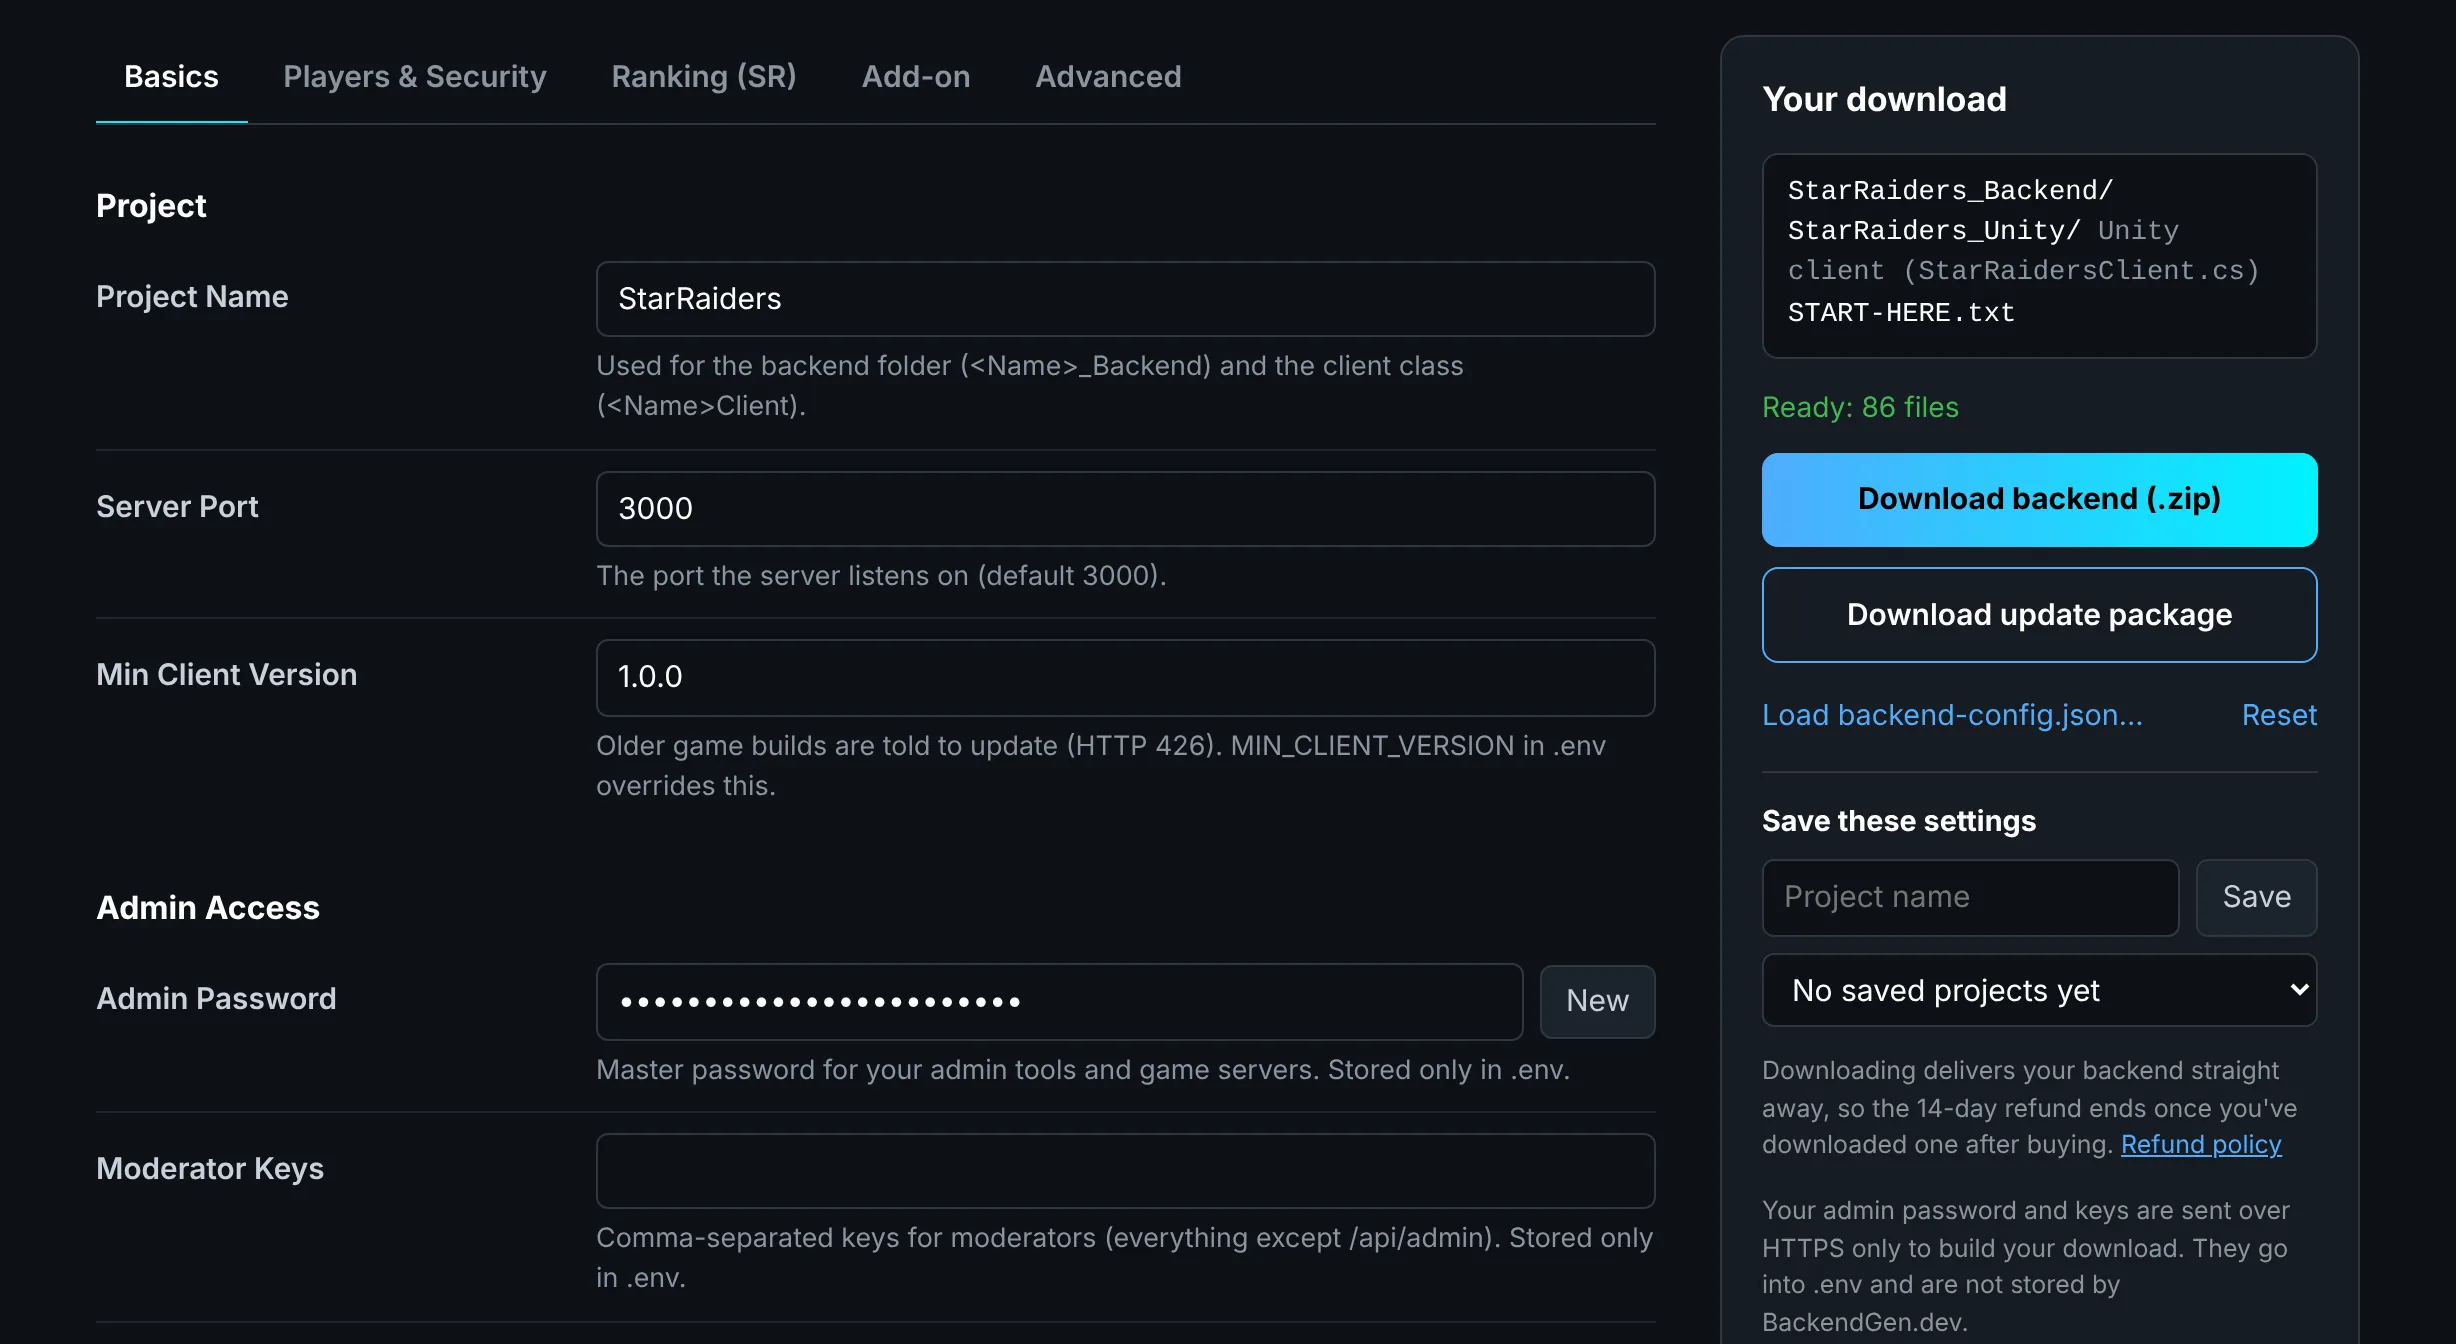
- Settings in tabsThe same choices as the Unity editor window, grouped by topic.
- Explained as you goEvery setting says what it does and where it ends up.
- See what you'll getThe folders and files in your download, named after your project.
- Checked as you typeDownload as soon as it says Ready. Anything wrong is listed here.
- Save your settingsCome back later for changes and update packages.
From sign-up to a running server
Six steps, and the first four take minutes: you can have a backend running on your own computer before your coffee goes cold.
Create your free account
Create an account with your email address and confirm it from the email we send. That's enough to try the generator: every setting and check works. You buy Base or Advanced when you want to download. If you bought Universal Backend Generator on the Unity Asset Store, enter your invoice number on your account page instead and your web licence is free.
Choose your settings
Name your project and pick the features you want, a tab at a time. The defaults are sensible, so you only change what matters to your game.
- Basics: project name, port, admin password, player accounts and match results.
- Players & Security: who can read and write each kind of data, as a table of rules you can edit, plus Would this be allowed? to test a request before you ship.
- Ranking (SR): pick a ranking style and see exactly how it scores, in plain English.
- Add-on: PostgreSQL, matchmaking, guilds, economy, live updates and hosting files (Advanced licence).
Already use the Unity version? Load your backend-config.json and carry on where you left off.
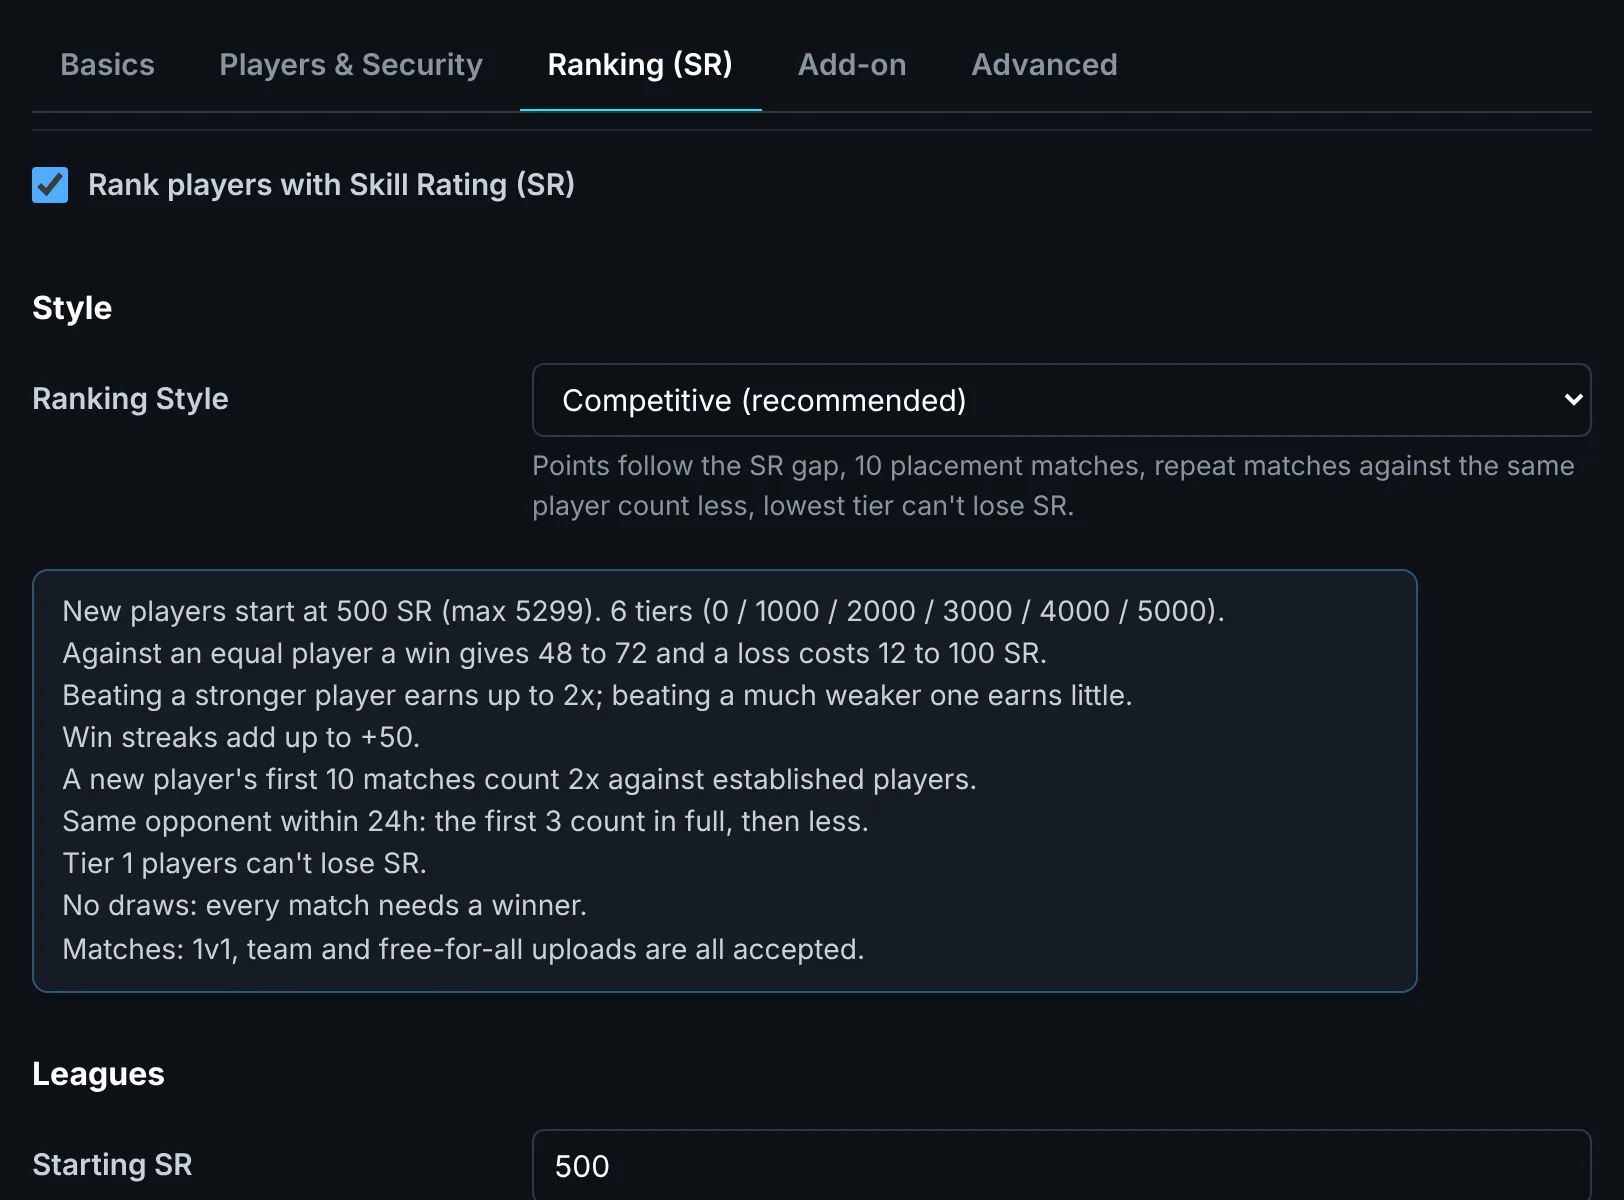
Fix anything it flags
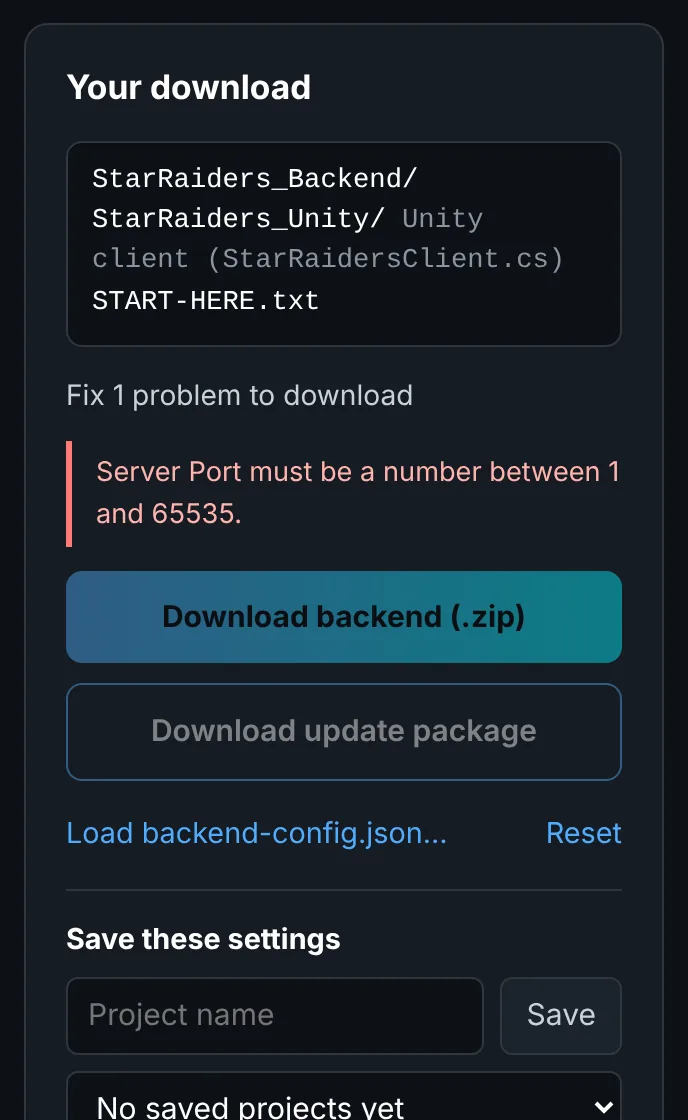
Your settings are checked as you type, using the same rules as the generator itself. If something would stop the backend working, the download panel says exactly what and the download waits until it's fixed.
Things that are allowed but worth a second look show as notes. You can still download with those.
Passwords and keys you type go into your backend's .env file only. They're sent over HTTPS to build the download and never stored by BackendGen.dev.
Download it and run it
Click Download backend (.zip). Unzip it, open START-HERE.txt, and follow it:
- Install Node.js 22 or newer.
- Double-click
start-local.cmdon Windows, orstart-local.commandon a Mac. - Open
http://127.0.0.1:3000/healthzto see it running.
README-SETUP.txt takes you the rest of the way: putting it online with HTTPS, backups and admin access.
start-local is for trying it: it stops when you close its window. On a live server, keep it running with PM2: pm2 start server.js --name mygame, then pm2 save. The deploy guide walks you through a whole server, HTTPS included.
StarRaiders.zip
├─ START-HERE.txt            what to do first
├─ StarRaiders_Backend/      your server, full source code
│  ├─ server.js              the API server
│  ├─ backend-config.json    rules and switches: edit, restart
│  ├─ .env                   your passwords and keys
│  ├─ start-local.cmd        double-click to run
│  ├─ update.js              one-command live updates
│  ├─ verify-backend.js      checks everything works
│  ├─ README-SETUP.txt       going live, HTTPS, backups
│  ├─ clients/               JavaScript client + types
│  ├─ plugins/               Add-on: matchmaking, economy…
│  └─ deploy/                Add-on: Caddy, Render, Fly.io…
├─ StarRaiders_Unity/
│  └─ Assets/Scripts/Network/
│     └─ StarRaidersClient.cs   your Unity game's client
├─ StarRaiders_Godot/
│  └─ addons/starraiders_backend/  Godot 4 plugin + example
└─ StarRaiders_Unreal/
   └─ Plugins/StarRaidersBackend/  Unreal Engine 5 plugin
Connect your game
Copy the Assets folder from the Unity part of the zip into your Unity project. It merges into Assets/Scripts/Network. Add the client (for example StarRaidersClient) to an empty GameObject in your first scene and tick Use Localhost to test against the server on your computer.
When your server is online, set Production Ip to its address and tick Use Https. The client works in WebGL and IL2CPP builds.
Making a Godot game? Copy the addons folder from the Godot part of the zip into your project and enable the plugin. Then await Backend.sign_in("PlayerOne") from any script. Play our demo game to see a Godot game doing exactly that. Making an Unreal game? Copy the Plugins folder from the Unreal part into your project and use the Blueprint nodes or C++ (Unreal guide). Something else? Use the JavaScript client in clients/, or any language with the OpenAPI description.
Update it later, without losing anything
Save your settings in the generator, and they're listed under My projects on your account. When a new version comes out, open your project and click Download update package.
On your server you double-click the updater. It backs up, replaces the program files, restarts and checks the server, and rolls back by itself if it doesn't come up. Your database and keys are never touched. Every 1.x update is free.
Not a game? The business generator
The same idea for shops, salons, clinics, trades and offices: a staff portal your team signs in to, with the records you choose. With Advanced, add an online shop and bookings for your website.
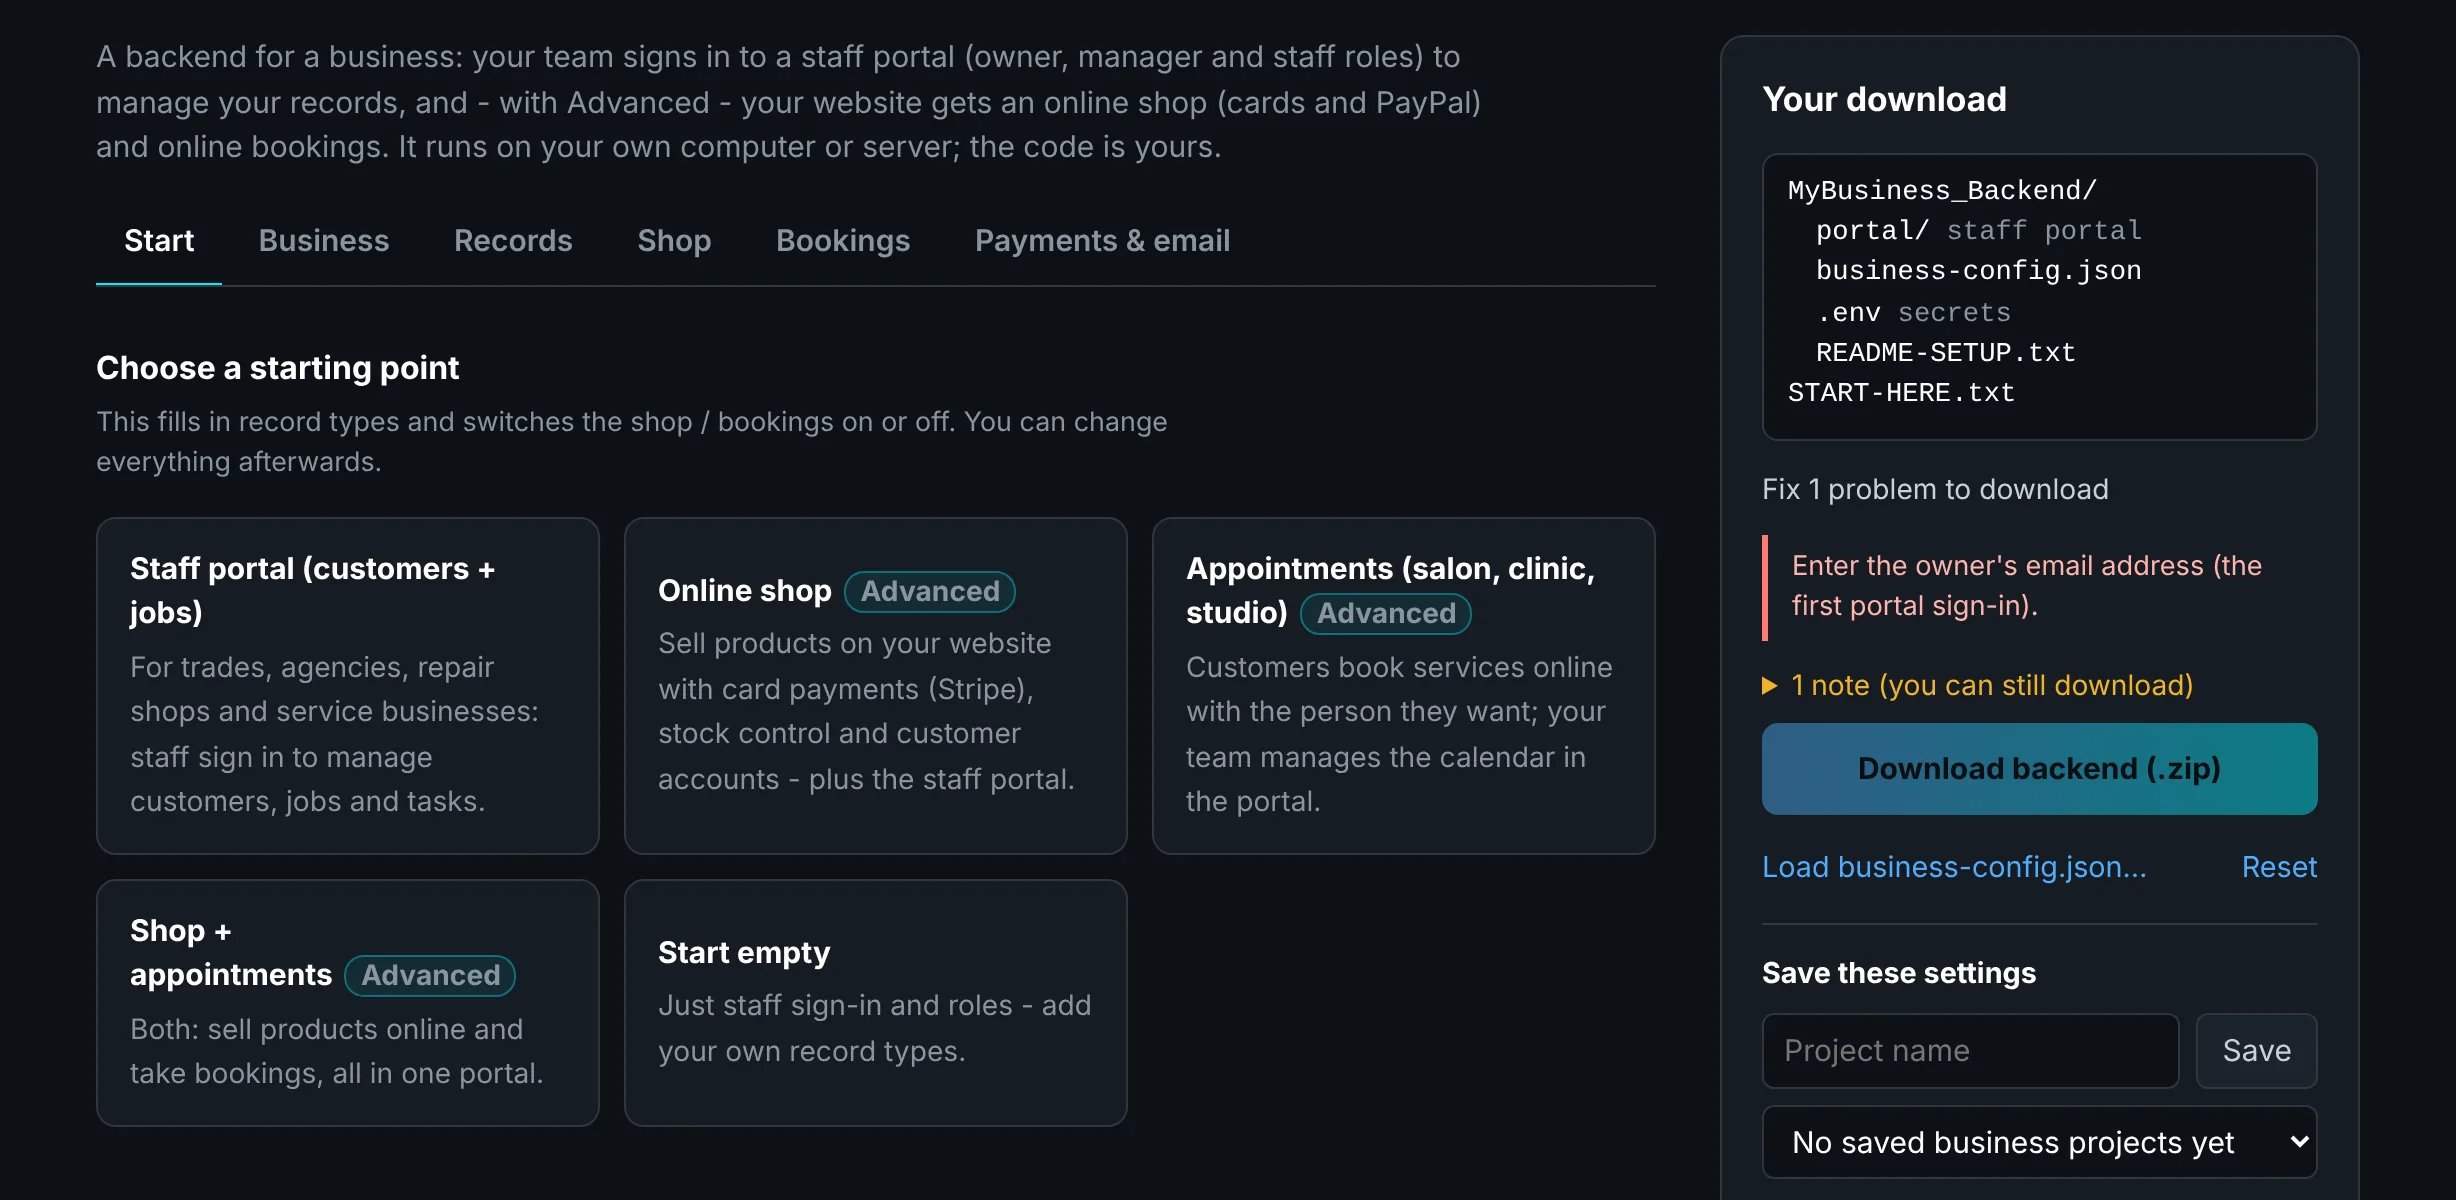
- Start from a templateStaff portal, online shop, appointments, or both, or start empty.
- Your own record typesCustomers, jobs, stock, suppliers: name the lists and the fields each one has.
- Payments go to youThe shop takes cards through your own Stripe account and PayPal through yours. We never see the money.
- Runs the same wayDownload, double-click
start-local, and your team signs in at/portal.
Ready to build your backend?
Try it free with an account: fill in every setting and see exactly what you'd get. Buy a licence when you want to download, or claim your free one if you bought on the Unity Asset Store.